Electronics Demo
Click to view a demo video.
Welcome to Nim Batchelor’s “Electronics Demonstration Box.” This project is designed to inspire makers to explore the possibilities of electronics in their creations. By playing with the box, you might uncover new ideas that you hadn’t considered before. Even if you’re a beginner, you can succeed with this technology.
Two modes
The box has two modes: demo and stand-by. The demo mode with cycle through all the functions. The stand-by mode is ready for your interactions.
Demo mode
In demo mode, the box will loop through the following:
- play an introductory message through speakers
- flash colored patterns with the LED strips
- display texts on the screen
- display the current temp and humidity inside the box
- display the tilt information and if the box is tapped, it will tell a joke and invite you to tap on it again. At which point it will tell one of six knock-knock jokes.
- display the distance and change the colors of the LED based on the distance between your hand and the sensor on the front
- turn off the switch at the top of the box when it’s flipped. That’s the “useless machine” function.
Stand-by mode
In “standby mode” the box will:
- display the name of the maker space,
- light up the led strips,
- sense whether the “useless machine” switch has been flipped,
- sense whether there have been two taps–which, if there has been–it will tell you one of six pre-recorded knock-knock jokes.
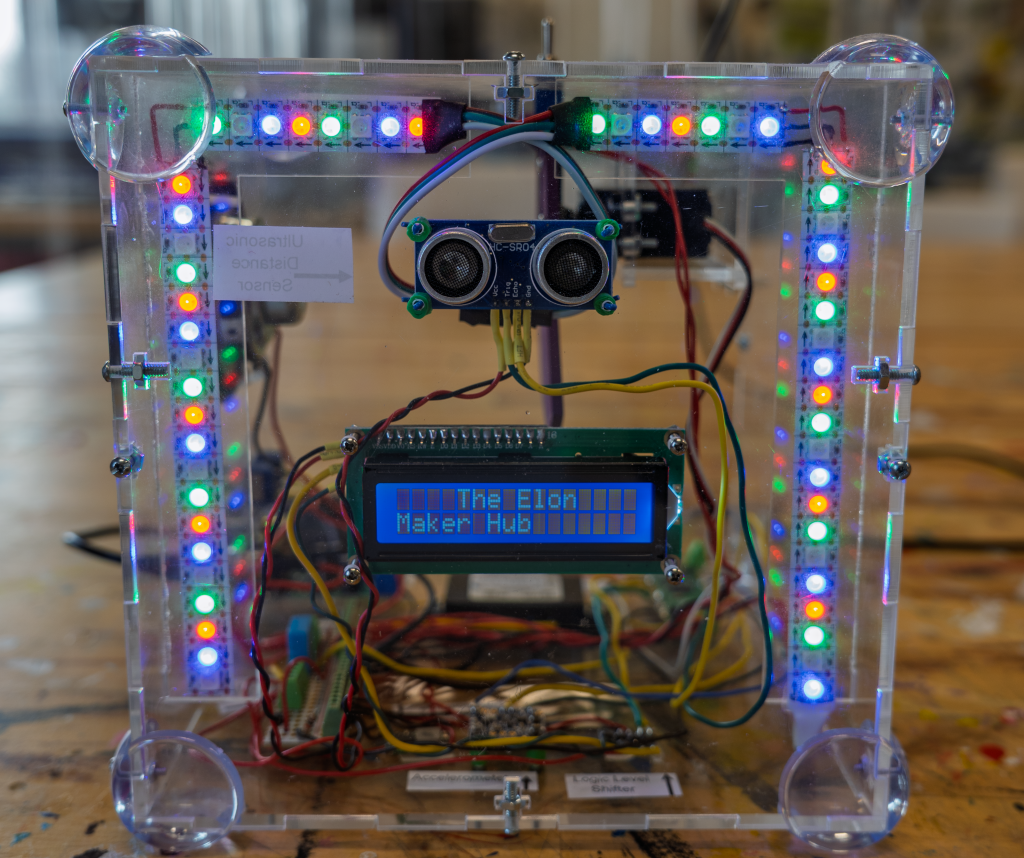
What’s inside?
Here is a list of the components inside the box and what they do.
- Raspberry Pi Pico – a small, low-cost microcontroller that is the brain of the project. The microcontroller controls all of the components listed below.
- Adafruit accelerometer – measures the tilt, motion, and orientation of the box. This also triggers the knock-knock jokes.
- Ultrasonic sensor – measures distances
- Temp and humidity sensor – measures inside the box
- Servo motor – moves the arm to switch the “useless machine”
- LCD display – displays information
- Audio amplifier – controls audio levels send through the speakers
- Logic level shifter – helps manage the power being sent from the power supply
- 12 to 5-volt buck converter and a 5 to 3.3-volt converter – because parts inside the box have different voltage requirements, the converters ensure each part receives the correct, lower voltage.
What else?
- Code and Wiring: You’ll need code to help the Pi Pico control those components and a diagram to know how to wire everything together (a schematic). Both are available for download on Github.
- Box: The box was designed in Autodesk Fusion and laser-cut from acrylic. Then screwed together. The Fusion file can be viewed and downloaded here. You could also create your own box design using a box generator like Boxes.py.